Compost 101: How to Compost
Get the dirt on composting: the benefits, what to include (and what not to), and finding the right balance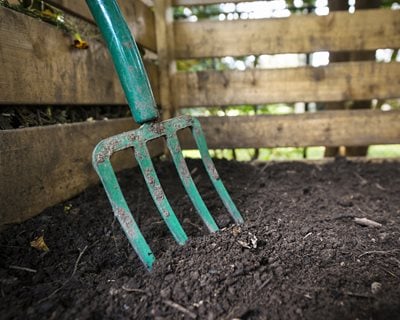
Photo by: Elena Elisseeva / Shutterstock.
A solid foundation is key to the success of any endeavor, and gardening is no exception. Like humans, plants need good nutrition to grow, thrive, and be better able to fend off the effects of harmful pests and diseases. Good soil, which provides the foundation for a healthy garden, seldom occurs naturally, but has to be created. One of the best ways to enhance the fertility and consistency of the existing soil is to make your own compost.
Nearly all native soils are deficient in nutrients and tilth (physical condition), with most being too clay, rocky, lean, or sandy, resulting in a less-than-ideal environment for plants to grow. Enhancing the soil with compost and other nutrient-rich substances such as livestock manure or worm castings will improve soil structure, texture, aeration, and its ability to retain water. It also helps with erosion control, pH balance, and healthy root development.
WHAT IS COMPOST?
In its raw form, compost consists of carbon-based brown matter such as dead leaves and small twigs, and nitrogen-based green matter such as grass clippings, fresh plant trimmings, and plant-based kitchen waste. Composting is the process of transforming this raw material through decomposition with the assistance of beneficial insects, earthworms, and microorganisms (bacteria and fungi) into a nutrient-dense, soil-like matter that’s added to existing soil.
THE PROCESS OF COMPOSTING
Composting can be as simple as allowing a neglected pile of plant debris to break down on its own, which is referred to as passive or cold composting. However, this can take up to a year or more, with inconsistent results.
Active or hot composting speeds up decomposition by introducing oxygen (turning the pile), adding moisture, and providing the proper carbon-to-nitrogen ratio. This allows microorganisms to do their job more efficiently and raises the core temperature to 120-160 degrees F, accelerating the process by “cooking” the pile. By employing these tactics, composting can be accomplished in as little as 1 to 3 months.
WHAT TO INCLUDE IN COMPOST
Like a good food recipe, it’s important to have the right mix of ingredients. Carbon and nitrogen are the two essential elements for composting, and the proper carbon-to-nitrogen ratio is crucial for efficient decomposition. The microorganisms responsible for breaking down plant matter digest carbon as an energy source, while nitrogen is ingested for protein synthesis.
An efficient compost pile should contain more carbon than nitrogen. Too much carbon can slow down decomposition, while too much nitrogen can result in unpleasant smells. The optimal ratio is around 2 to 3 parts brown matter (carbon) to 1 part green (nitrogen) by volume.
Carbon sources include: dead leaves, woody branches, conifer needles, bark dust, sawdust, brown paper bags, shredded office paper, newspaper, cardboard, coffee filters, straw, and wood ash produced from fireplaces and wood stoves.
Nitrogen sources include: freshly cut grass clippings and other green plant trimmings, fruit and vegetable kitchen scraps, used coffee grounds, eggshells, seaweed, kelp, blood meal, and livestock manures.
HOW TO MAKE COMPOST
- Break it down: Cut or shred plant material down into smaller pieces to increase the surface area, which allows microorganisms to digest it more quickly.
- Make layers: Lay down several inches of twigs or straw first to provide drainage and aeration on the bottom. Alternate layers of brown (carbon) and green (nitrogen) materials on top of each other—much like a pan of lasagna—so that materials are evenly distributed and readily available to microorganisms. Finish off with a top layer of brown matter to help reduce unwanted odors. Fill a small composter as full as possible, or create a pile three-feet deep.
- Add starter: Activators, while not necessary, can be added to kick-start decomposition. Natural activators include chicken manure, comfrey leaves, grass clippings, and fresh weeds (without seed). Other activators or starters are commercially made and available online.
- Add moisture: Water the pile just enough to moisten, then repeat occasionally if you don’t receive regular rain. Too much water can make the pile soggy and cool the core temperature, slowing decomposition. Not enough water can slow or halt decomposition entirely. The consistency should be similar to that of a wet sponge that has been wrung out. To check the moisture content, pick up a handful of compost and squeeze it. If water trickles out, the pile is too wet. If there are no droplets, the pile is too dry. A few droplets when squeezed indicates that the moisture content is just about right.
- Cover: Lay tarps, plastic sheeting, or wood over an open pile to retain heat and moisture.
- Aerate: Turn the compost every 1 to 3 weeks with a pitchfork or spin if you have a tumbler. This is also a good time to add more water if necessary to ensure that all parts of the pile stay damp.
- Neutralize odors: Add lime or calcium if necessary to deter flies and neutralize odors. If the compost develops an ammonia-like smell, add more carbon-rich materials such as dried leaves or straw.
- Monitor temperature: The internal temperature of the pile can be monitored with a compost thermometer.
HOW TO USE FINISHED COMPOST
For new beds or borders: Amend the soil prior to planting. Add a layer of compost 1 to 3 inches thick on top of the existing soil and mix it in to a depth of 6 to 12 inches.
For established beds: Add a fresh layer of compost 1 to 2 inches thick on top of the soil in fall after plants die back, or in early spring before plants break dormancy. In addition to feeding plants, the compost layer suppresses weeds and retains moisture.
For vegetable plots including raised beds: Dig or till in 1 to 2 inches of new compost at the start of the growing season.
ENVIRONMENTAL BENEFITS OF COMPOST
With kitchen and food waste comprising up to one-third of all household garbage, composting is a great way to reduce your garbage, as well as your carbon footprint. When organic matter ends up in landfills, it lacks the necessary conditions for optimal decomposition, creating harmful methane gas in the process which contributes to global warming and climate change. Kitchen countertop compost bins make it easy to store your scraps before adding them to your compost bin or pile.
DON'T COMPOST THIS
- The waste of carnivorous animals—including dogs and cats—can contain parasites and dangerous bacteria that are difficult to kill with traditional composting methods.
- Meat, bones, and fish scraps are slow to decompose. They can also attract pests and cause unpleasant odors.
- Oil, fat, or kitchen grease are slow to break down and attract pests, as well as cause odors.
- Big chunks of wood break down too slowly.
- Pressure-treated wood or railroad ties contain harmful chemicals.
- Plant matter such as lawn clippings that have been treated with chemical pesticides or fertilizers should be omitted. It’s important to produce clean organic compost—especially if you’re growing food—so that you’re not exposing yourself to chemicals that can be hazardous to your health.
- Keep out seeds of invasive plants such as pokeweed and butterfly bush, as well as weed seeds, which can germinate if compost doesn’t get hot enough for a sufficient amount of time. It takes 30 days at 140 degrees F to kill most weed seeds.
- Don’t introduce diseased plant debris, as pathogens can remain alive in finished compost and be spread to healthy plants in the garden.
TYPES OF COMPOSTERS
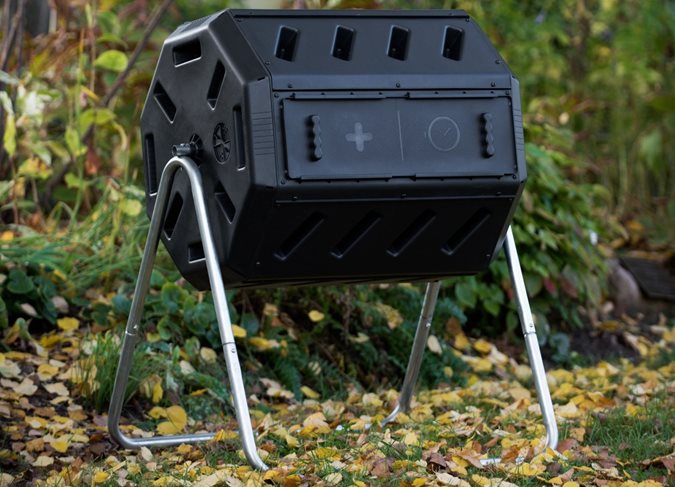
Photo courtesy FCMP Outdoor.
MANUFACTURED COMPOST BINS OR TUMBLERS
Manufactured compost barrels or bins are sold mainly online, and through some nurseries and garden centers. These containers, which are generally made of wood, metal, wire mesh, or plastic, are designed to allow air and water in while keeping pests out. Some are stationary, where the compost is turned by hand. Compost tumblers turn the material over with a spinning mechanism. These are suitable for smaller urban yards and apartments with a patio or balcony.

Photo by: Evan Lorne / Shutterstock.
DIY COMPOSTERS
You can also make a DIY compost bin from something as simple as a garbage can, plastic storage container, or milk crate. Get creative and come up with your own unique system. Check out our DIY Compost Bin Pinterest board for more ideas.
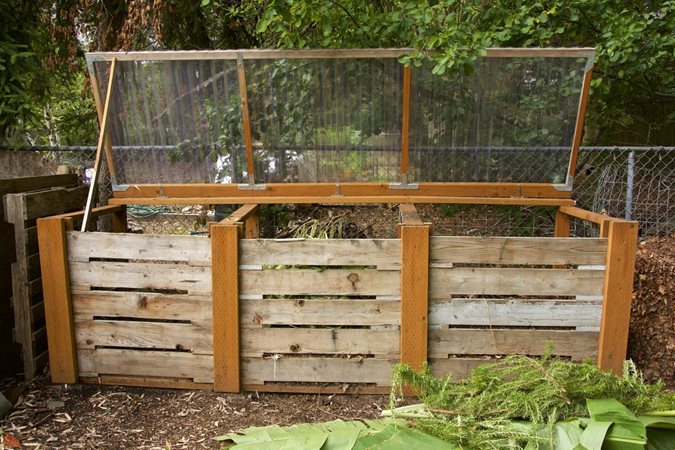
Photo by: Janet Loughrey.
MULTI-BIN SYSTEMS
If you have a large yard or acreage and anticipate making a lot of compost, you can make a pile or build a more elaborate system. This can consist of one or more bins, usually made of wood, wire mesh, metal, or cinder blocks. A three-bin system allows for continuous production, as compost in various stages of decomposition is transferred from one bin to the next. The first bin is for fresh plant matter, the second for compost as it’s breaking down, and the third for compost in its final phase that will eventually be added to the garden.
ADDITIONAL TIPS
Find out what your soil needs: A soil test kit analyzes your soil for pH and nutrient levels, providing the information you need to correct any deficiencies. More sophisticated analysis is available through private companies, as well as many local extension services. Repeat testing every 1 to 3 years.
Keep pH balance in check: Soil pH, which refers to acidity or alkalinity, affects a plant’s ability to take up nutrients from the soil through its roots. Some plants, such as rhododendrons and azaleas prefer acidic soil, while many vegetables prefer slightly alkaline conditions. Other plants do best with neutral pH, or are tolerant of a wide range of conditions. Regions that receive more rainfall tend to have slightly acidic soil, while dry climates tend towards alkaline conditions. Adjust soil pH by adding lime to increase alkalinity, or sulphur to increase acidity.
Worm composting: Another method of producing organic matter for your garden is through vermicomposting. Raising red worms—also called red wigglers—in an enclosed bin produces castings (waste) that are some of the most nutrient-rich matter available in nature. The basic process is simple: Provide moist bedding (shredded newspaper, cardboard, or coconut coir) and add kitchen scraps. The worms will eat their way through the material, producing waste in the process. These castings can then be added to your garden. Worms and bins and can be purchased online. Learn more about worm composting.
RELATED:
Organic Gardening
Garden Soil 101
Irrigation 101
Garden Fertilizer 101

