The Hidden Trick to Placing Pots in Garden Beds
See how to set containers into garden beds with a secure base that keeps them level and in placeWhen choosing where to place a container, I often position it within the garden bed. Many people are surprised by this, but think about it—why not? Who says containers only belong on patios, porches, or decks? Nestled among plants, an elevated container draws the eye, commands attention, and through its height, adds another dimension to the garden bed.
Planted Pots: Create a Stable Base
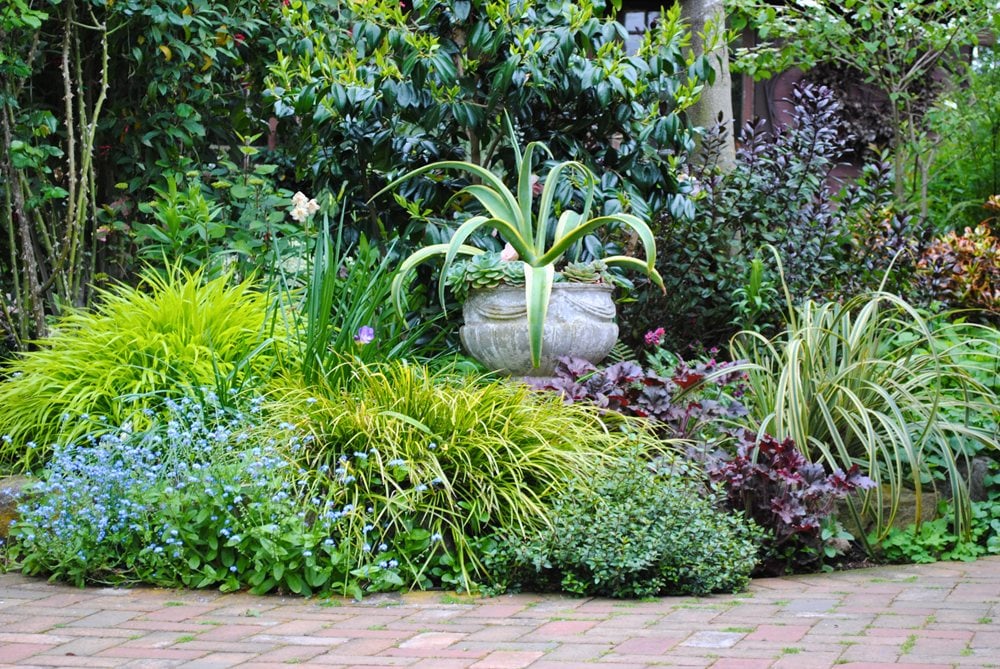
A classic urn-style container filled with sculptural Agave desmetiana ‘Variegata’ nestles within the garden bed, surrounded by textural grasses, heuchera, and forget-me-nots. The agave’s bold, architectural form provides a striking contrast to the soft, billowing layers around it, drawing the eye while still feeling grounded in the planting. Photo by: Rebecca Sweet.
However, it's important to create a stable surface for the container when placing it in the garden bed. There are two main reasons for this: first, to create an air gap between the drainage hole and the soil, which prevents poor drainage and root rot from excessively soggy roots, and second, to keep the container level. A crooked container can quickly ruin the composition of a garden bed!
Related: Make Your Garden Containers Work for You

The Phormium ‘Jester’ echoes the earth-tones in this textural container, helping it to blend seamlessly into this garden bed. And when tucked among ornamental grasses, shrubs, and river rock, the result is a quiet integration, where container and planting work together as a cohesive, layered composition. Photo by: Rebecca Sweet.
To create a stable base for your container, dig a hole about 6 inches deep and as wide as your pot. Fill the hole with fine sand or decomposed granite, tamp it down as firmly as possible, then place a paver on top of the tamped-down sand. Use a level to ensure it is perfectly even.
Next, ensure there is a ½-inch air gap between the paver and the pot's drainage hole. Without this gap, the drainage hole may become clogged with soil, leading to poor drainage and root rot.

Planted with architectural Euphorbia ‘Blackbird’ and trailing succulent Oscularia deltoides (Pink Ice Plant), this artichoke-inspired container adds structure and color to an already lush mix of perennials and shrubs. The euphorbia’s dark, moody foliage creates a striking focal point, while the succulents soften the edges as they gently drape over the rim. Together, they lend a sculptural quality that elevates the surrounding planting without overpowering it. Photo by: Rebecca Sweet.
A simple way to elevate the pot is by using pot feet (available online and in garden centers), or by using skinny bricks (full bricks cut in half lengthwise, also known as 'queen closers'—isn't that a great name?), or even repurposed objects such as 1-inch square tile samples commonly found at tile or home improvement stores.
Finally, to keep the focus on the container, cover any exposed paver corners with nearby mulch or groundcover plants. This helps the container blend naturally with the surrounding garden.
Related: 24 Flower & Garden Bed Ideas
Unplanted Pots: Secure with a Simple Anchoring System

Used as a focal point, the unplanted blue urn rises above nearby grasses, shrubs, and seasonal blooms. Its tall height is in proportion to the surrounding shrubs, and its color echoes the neighboring blue blooms of Ceanothus ‘Ray Hartman’ and Rosemary ‘Mozart’. The simplicity of the empty vessel allows the surrounding plants to shine while still drawing the eye upward. Photo by: Rebecca Sweet.
When placing tall, heavy, oversized containers that you plan to leave unplanted, securing them is especially important. In my garden, we have groups of deer that occasionally wander through, and the last thing I want is for them to knock over my prized pots accidentally!

A small concrete footing is poured to form the base that will anchor and stabilize the precarious container. This hidden foundation ensures the vessel remains secure, even in exposed or high-traffic areas. By setting it properly from the start, the container becomes a lasting, worry-free feature in the garden. Photo by: Rebecca Sweet.
Although this method is a bit more involved, my husband and I have developed a reliable way to keep these heavy pots secure. We fill a 2-foot-deep hole with concrete and insert a bolt into the concrete (with a temporary piece of wood to prevent it from sinking to the bottom).

Taking it one step further, this hidden anchoring method keeps the urn firmly in place, even with rambunctious deer that like to visit the garden. Photo by: Rebecca Sweet.
Once the concrete is dry, we remove the wood and set the pot on the concrete slab, ensuring the bolt goes through the drainage hole. We then fasten it in place with a washer and nut on the bolt (which doesn’t form a water-tight seal, allowing any rainwater to drain through).

This empty urn serves as a sculptural element, adding color, form, texture, and year-round interest among the surrounding foliage and fall color. Photo by: Rebecca Sweet.
Voila! No matter how heavy your containers may be, securing them in place provides a little peace of mind while ensuring they’ll remain intact and perfectly positioned for years to come.

BOOK REBECCA AS YOUR NEXT GARDEN SPEAKER!
Fun, passionate, and knowledgeable, three words that describe Rebecca Sweet! See what discussion topics are available and watch a short video as Rebecca explains how her talks will inspire, entertain, and educate gardeners at all skill levels.
Thursday, November 19th @ 6 PM ET / 3 PM PT
A Look Inside “The Essential Guide to Bulbs” with Jenny Rose Carey
RELATED:
More from Rebecca Sweet
Unexpected Surprises in the Garden
Creating Echoes in the Garden
Designing With Foliage Over Flowers