How to Grow Your Own Plants From Seed
Get a head start and grow your favorites by starting plants at home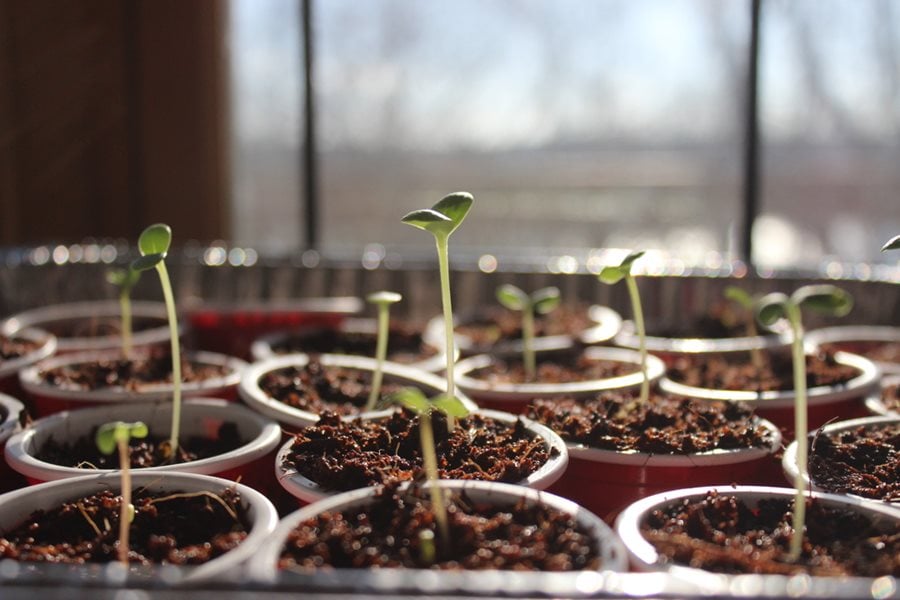
Photo by: Sara Guyre / Shutterstock.
As more people turn to gardening as a hobby or to grow their own food, they’ve also discovered the rewards of growing plants from seed. It’s easy to become addicted to watching life sprout from a tiny seed that you’ve nurtured yourself. Starting seeds indoors allows you to get a head start on the growing season and to get your hands dirty, even if there’s still snow on the ground.
Many vegetables, annuals, and perennials are easy to grow from seed. It’s more economical than purchasing nursery starts and allows you to start plants early such as tomatoes and peppers that take longer to mature. Many unusual and heirloom varieties are only available from seed, so it’s a good way to insure you get the varieties you want. Here’s how to get started.
On this page:Featured in: Garden Design's Top 10 Garden Trends for 2022 ("Taking Your Food from Start to Finish")
GETTING STARTED WITH SEEDS
Keep it simple:
Start out with a few varieties so you don’t become overwhelmed. Choose easy-to-grow plants such as marigolds, nasturtiums, and basil to maximize success. Prioritize your favorite plants.
Buy seeds:
There are thousands of seed varieties to grow. Browse nurseries, catalogs and online seed sources. Some companies may specialize in seeds that perform well in your region.
Know when to plant seeds:
Know the average first and last frost dates for your area. Refer to the instructions on the seed packet to determine how many weeks before the last frost date to start your seeds indoors for spring planting. For fall planting, calculate planting time by taking the number of days or weeks to harvest and count backwards from your first average frost date.
Follow instructions:
Plants have different growing needs, so research each variety before you plant. Seed packets are a good source of basic information, such as when to sow, seed depth, days to germination, fertilizing requirements, and transplanting recommendations.
- Seeds may need to be presoaked, nicked, or chilled before planting.
- Some seeds should be covered with a thin layer of soil, others should be left exposed, while some need darkness to germinate.
- Note germination times. Some seeds will sprout in just a few days, while others take up to several weeks.
Get organized:
Use a calendar, gardening journal or app to keep track of pertinent information, such as last frost date in your area. Keep detailed notes for each variety, such as when to plant, date of planting, germination time, fertilizing schedule, and when to transplant outdoors.
Save seeds:
Many seeds will last more than one year. Store unused seeds inside a paper bag (this may go inside a plastic bag) in a cool, dry, and dark place. To test if older seeds are still viable, place a few seeds on a damp paper towel inside a plastic bag and set in a warm place. Most seeds will germinate within 2 to 14 days.
SEED STARTING SUPPLIES
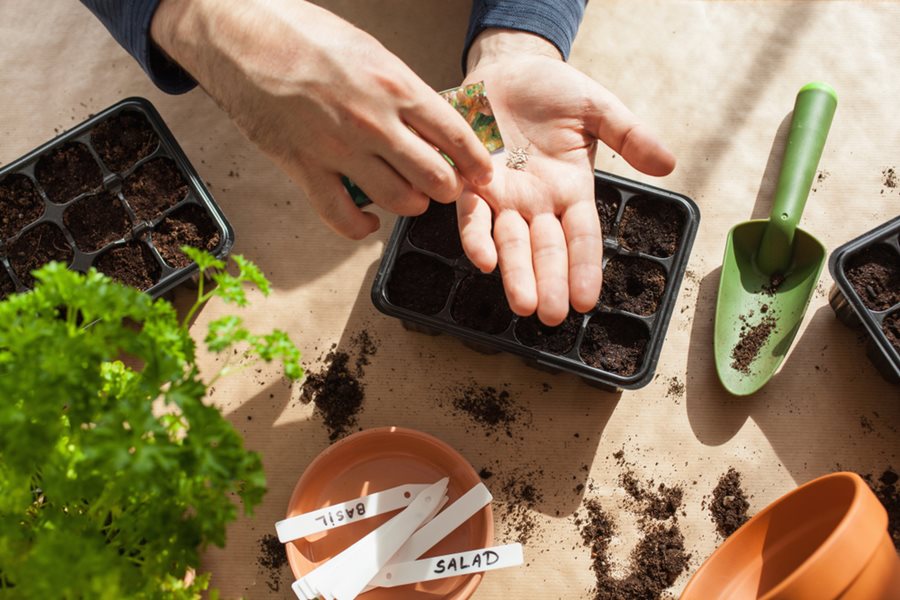
Photo by: Olga Miltsova / Shutterstock.
Plants have basic needs of light, soil, water, and nutrients. Since indoor conditions can be less than ideal, seedlings will need extra help in order to thrive. Maintaining the optimal temperature for germination, using the right soil, and providing sufficient light will allow seedlings to develop into healthy plants.
Light:
Most indoor environments—even sunny windowsills—lack sufficient light, resulting in plants that are leggy and weak. Using grow lights helps to get healthy, vigorous growth. There are many different types for small or bigger spaces.
Soil:
Although any high-quality all-purpose potting mix is suitable for seed starting, specialized seed starting mixes are recommended, as they are finer and more porous, allowing for better drainage and seed-to-soil contact. Use a soilless mix without added fertilizers and make sure it’s fresh so it doesn’t harbor diseases. (Learn more about potting soil and potting mixes.)
Containers:
- Garden centers and online sources sell a variety of seed starting trays and flats.
- Try a seed starting kit, which gives you everything you need to get growing.
- Biodegradable pots are especially ideal for seedlings with delicate roots, as they can be planted directly into the ground.
- Household items such as paper cups, milk jugs, or egg cartons can be converted into growing containers. Make sure they are clean and have adequate drainage holes.
PLANTING SEEDS
- Prepare potting mix: Pre-moisten potting soil in lukewarm water until moist but not soggy. Fill pots or cells with soil and gently press down to remove air pockets. Leave room to cover seeds as needed.
- Sow the seeds: Plant as instructed on packet. Larger seeds such as beans can be sown 1 to 2 seeds for each cell or pot, while smaller seeds can be gently sprinkled at least 3 to 5 per cell since some seeds may not germinate. For varieties that need light to germinate, lightly press seeds into the soil to make good contact, but don’t cover. Mist the soil surface with water.
- Add labels: For each pot or flat, write on a plant label the variety name, along with date of sowing.
- Cover the containers or seed trays: Place a plastic bag or dome over the top, which acts like a mini greenhouse to hold in heat and moisture. If germination takes longer than a few days, uncover occasionally to allow air circulation and prevent moisture buildup.
SEED & SEEDLING CARE
Keep warm:
The average household temperature between 60-75 degrees F is sufficient for most seeds to germinate. However, some may require warmer soil and the use of a specialized heating mat.
Provide light:
Some seeds require light to germinate, and grow lights should be used 12-16 hours a day from the time of planting. For others, you can wait until seedlings emerge to turn on the lights.
If not using lights while waiting for germination, be sure to check your seeds daily, as missing germination by as little as 24 hours can result in leggy seedlings.
The distance of the grow light above the seedlings will need to be adjusted as the seedlings grow. Keep lights 2-3” above the tops of the seedlings. Yellow or brown leaves can indicate lights are too close; stretched or leggy seedlings can mean your lights are too far away.
There are many types of grow lights (LED, fluorescent, T5, etc.) as well as different wattages, and this can also play a part in finding the correct height that works for you.
Ventilate:
Provide adequate air circulation to prevent damping off disease, a fungal disease that will quickly kill seedlings. An oscillating fan on low for a short periods throughout the day works well.
Water:
Keep soil evenly moist but not soggy. Don’t allow soil to dry out, as this can prevent germination or kill young seedlings. The first watering may not need to occur until after seedlings emerge.
Gently mist soil surface to avoid dislodging seeds. Plants can also be bottom watered by placing a shallow tray of water underneath. Allow to soak for 20 to 30 minutes or until the top of the soil feels moist. Don’t leave pots in standing water for an extended time, as it may cause root suffocation or fungal disease. Use water at room temperature to avoid plant shock.
Fertilize:
Wait to fertilize until seedlings develop their first set of true leaves, which follow the first leaves to unfurl, known as cotyledons. Apply a water-soluble fertilizer at a diluted strength every two weeks.
Thin seedlings:
Remove excess seedlings, leaving one plant per cell or pot. Some plants such as tomatoes can be successfully separated and replanted, while others such as poppies should not have their roots disturbed. Clip extra seedlings at the base with scissors to prevent root damage.
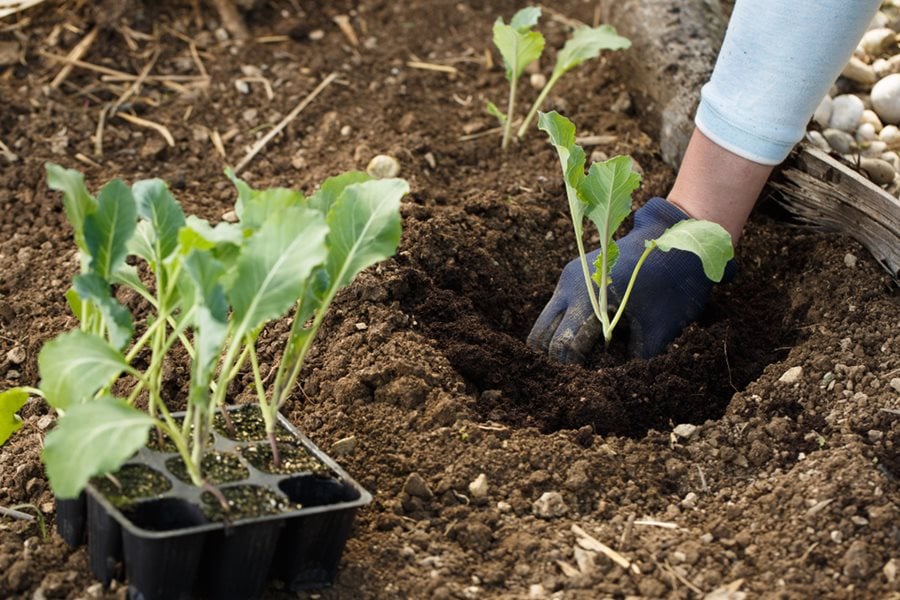
Photo by: zlikovec / Shutterstock.
Transplant seedlings:
Seedlings grown in seed starting mix should be transferred into standard potting soil once they begin to develop into larger plants. Varieties such as tomatoes and peppers will need to be transplanted into bigger containers and allowed to grow larger before being planted outdoors.
Harden off plants:
A week or two before your average last frost date, start introducing plants to the outdoors. Place in a shady sheltered spot, gradually increasing the amount of time outside each day. Cover or bring indoors at night. Move into direct sun for longer times. Seedlings can be left uncovered outside at night when temperatures remain above 50 degrees F. Plants should be fully acclimated in 1 to 2 weeks.
Plant permanently:
Once seedlings have been hardened off, they can be planted into their permanent spot. Water seedlings before and after transplanting. Avoid planting during the hottest part of the day.
STARTING SEEDS OUTDOORS
Many plants can be directly sown outdoors. Fast growers such as radishes and squash, and root vegetables such as carrots and beets, perform better with this method, as well as other plants that don't like their roots disturbed, such as poppies.
Cool-weather plants including peas and lettuce can be planted earlier in the season when soil temperatures reach 40-50 degrees F. Sow warm-weather plants such as cosmos, beans, and cucumbers when soil temperature is at least 65-70 degrees F.
RELATED:
How to Grow Tomatoes From Seed
Vegetable Garden Ideas, Design, and What to Grow
How to Start a Vegetable Garden
Success Secrets for Growing Edibles
Seed Sowing in the Snow

