DIY Sun Printing on Fabric
Sun printing on fabric lets you use the plants in your garden to create beautiful patterns, and the resulting fabric can be made into clothing or a framed work of art. We teach you how to make a cyanotype with step-by-step instructions.


Sun printing on fabric is a wonderful way to capture the summer sunshine and your favorite flowers, leaves, or seed pods. The chemically-treated light-sensitive fabric is available in silks and cottons, and is an incredibly easy canvas on which to design gorgeous botanic prints.
Sun prints are also known as cyanotypes, an early photographic process that was refined by Anna Atkins, a botanist who used the light-sensitive paper to reproduce images of plant specimens. It's easy to make your own fabric cyanotypes—I'll show you how in this article.
Two things to remember: First, there are lots of fabrics (and plants!) to design with, so experiment with test fabrics to get a feel for how different types of plants will print; second, watch the weather! Plan around wind, clouds, and, of course, rain.
That said, all you need is a sunny day and several tools:
- Sunprint fabric (I used charmeuse silk for my dress and framed print*)
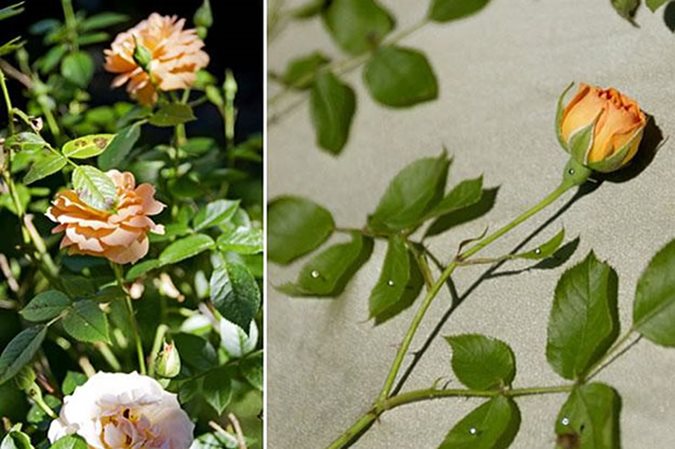
- Plant cuttings
- Pins
- Foam core board
- An iron
- Plexiglass (optional), for holding the plants flat against the fabric
- Thimble (optional), to help with pinning plants to the fabric
*The sun print fabric is available from Amazon, which sells cotton and paper sunprint material.
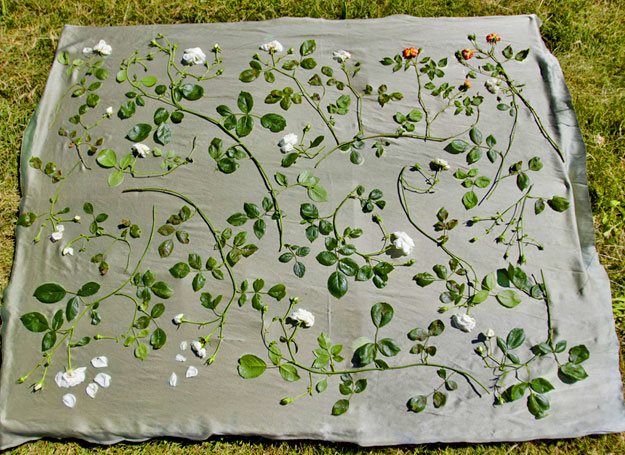
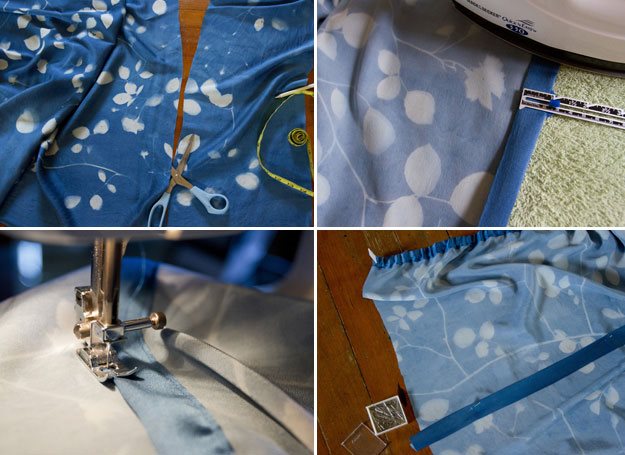
Project 1: Silk Summer DressPrepare your materials in an indoor space with no direct light. Cut the fabric to desired size, then iron to remove any wrinkles, as any variation in the fabric's contour might cast shadows on the final exposed print. Pin the fabric to the foam core board, keeping the surface slightly taut.
Step 1.
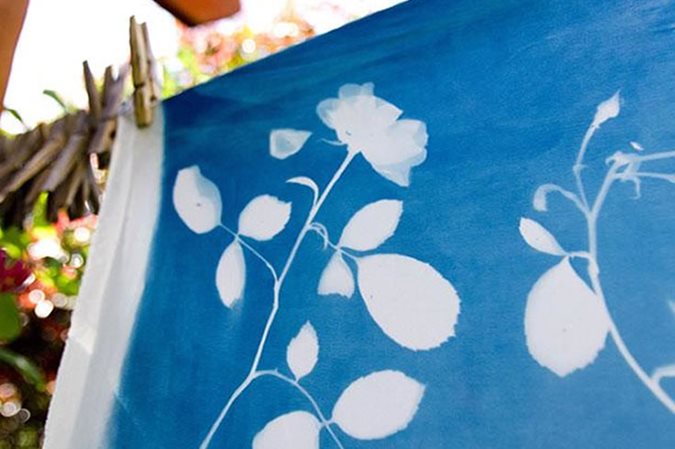
Make sure your plant cuttings (I used roses) are completely dry, and arrange them on the fabric. Pin them in place. It's worth experimenting with how closely the objects are secured to the fabric—a slightly raised flower will produce a soft outline and sense of depth, while a tightly pinned leaf will become a crisp silhouette. A thimble is useful to press in the pins if you are pinning many specimens, or those with tougher stems. (My rose pattern took an hour and almost 100 pins!)
Step 2.
My silk and roses thus secure, I brought the arrangement outside. Keep the board flat, and, if you are hoping for sharper outlines, do not move it during exposure—any shifts in the specimens' positions will result in softer silhouettes. Expose the fabric for the specified length of time (cottons generally requires 15 to 20 minutes, while silks take 8 to 12 minutes).

Step 3.
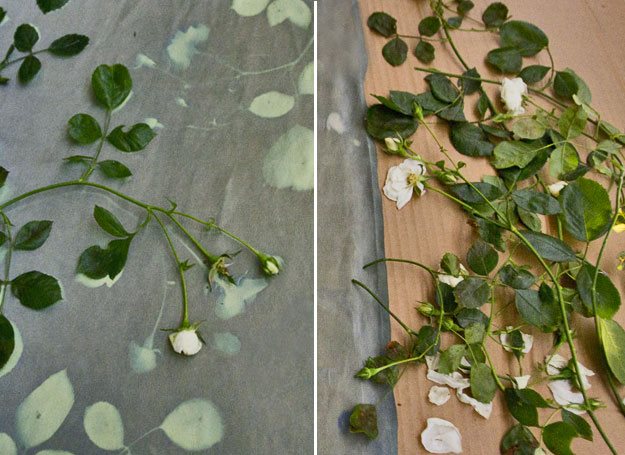
Bring the fabric indoors (avoiding sunlight once you're indoors). Remove pins and cuttings and dash to a sink or bathtub to set the fabric. Rinse your fabric until the water runs clear.

Step 4.
Lay flat or hang to dry. Colors will set in 12 to 24 hours. To get darker colors faster, dry fabrics in a clothes dryer. If, at any time, the image appears to fade after being in the sun, you can place the printed fabric in a dark place over night, and the colors will deepen.
Step 5.
Once my fabric dried, I began to cut, tuck, and sew the lustrous silk charmeuse to make a summer dress. I followed my own pattern, but any simple pattern for a silk sundress would work as well.
Project 2: Framed Dandelion PrintFor a second project, I wanted to experiment with very thin details, and I was curious whether I could capture the breezy dispersal motion of a dandelion seedpod. I was incredibly excited to find these giant specimens of a Giant Dandelion (Showy Goat's-beard, Tragopogon pratensis).
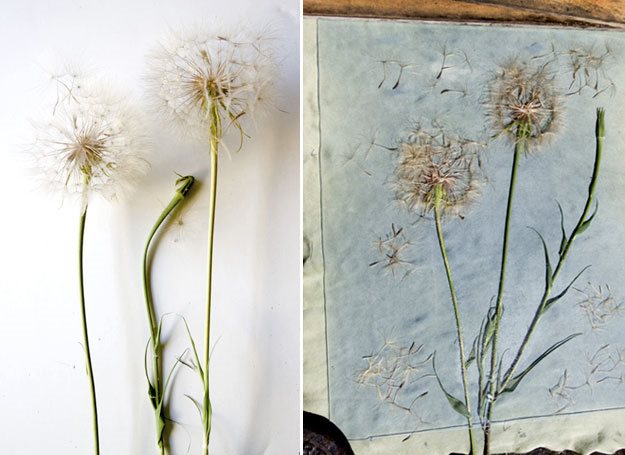
I used Plexiglass to secure the airy heads (and to prevent them from blowing away), and then, as an additional flattening measure, and I used boards and weights to hold down the edge of the Plexiglass to press the thin seeds against the fabric.
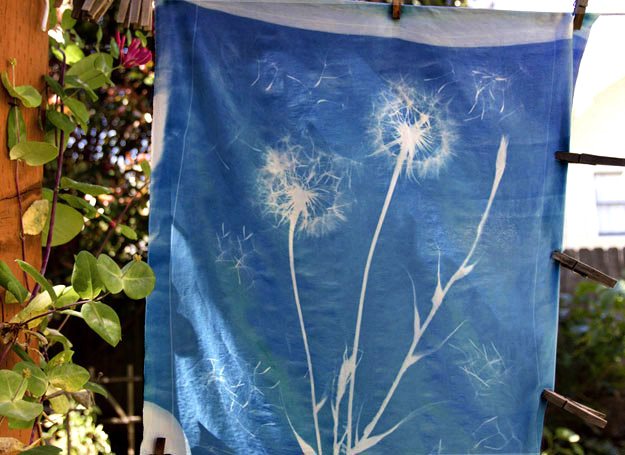
After 12 minutes in the sun and a thorough rinse, I hung the fabric to dry.
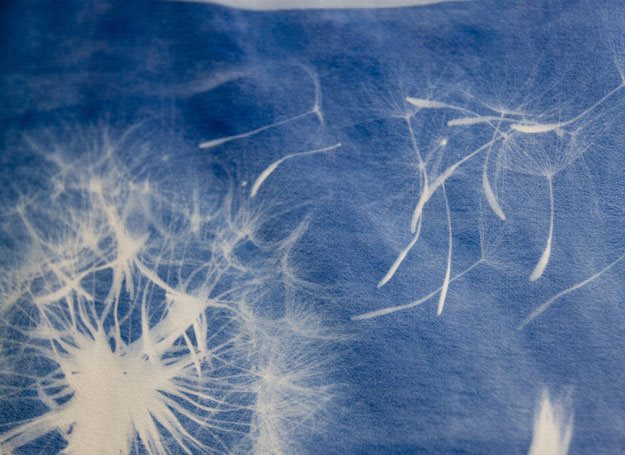
The detailed seed clusters were exactly what I had hoped for!

